

Overview
Brutus, also known as the Cow Boss, is a level 30 free-to-play boss unlocked after completing the Ides of Milk quest in Old School RuneScape. He’s found in the Lumbridge cow pen and is built as a true beginner boss. He’ll teach the basics of dodging telegraphed attacks without punishing mistakes harshly. That makes regular Brutus one of the best free-to-play combat methods in the game, and a fast, repeatable source of drops like the Mooleta, the only F2P defender in OSRS.

This guide covers Brutus’s mechanics, recommended gear, and his drops — then moves on to Demonic Brutus, the brutal members-only hard mode that’s become one of the toughest fights in the game.
Requirements
- Completion of the Ides of Milk quest
- Ability to defeat a level 30 boss (almost any account can manage this)
Location
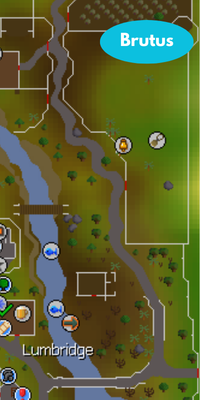
Brutus is located in the Lumbridge cow pen. After completing the Ides of Milk quest, you can challenge him there as many times as you like.
Brutus Mechanics (Regular)
The regular fight is almost entirely about movement. Brutus’s standard melee attack can be fully negated with Protect from Melee, so the only damage you need to worry about comes from his two telegraphed special attacks — both of which are easy to see coming and easy to dodge.
- Melee attack – His basic attack, completely blocked by Protect from Melee.
- Snort / Charge & Growl / Slam – When you see *snorts* or *growls* appear above his head, simply move a tile or two away to avoid the hit. These specials can still kill you even during the quest, so don’t ignore them.
- Overall – A simple, forgiving fight designed for lower-level players, with clear indicators every time he’s about to charge or slam.

Recommended Gear (Regular)
Brutus is designed to be beaten with almost nothing, so there’s no real gear check here. Bring your best free-to-play melee setup to kill him faster, and a few pieces of food if you’re a very low combat level — though most players won’t take any damage at all if they pray melee and dodge the specials. Higher-level accounts can clear the fight in well under 10 seconds, which is what makes farming his drops so efficient.
Brutus Drops
Brutus drops several unique items. The headline is the Mooleta, the only free-to-play defender in the game, which makes Brutus a genuinely worthwhile kill for F2P accounts. He’s also a strong source of beginner clue scrolls (and easy clues at a lower rate). Separately, Beef — his boss pet — sits at 1/1,000, making it one of the easiest pets in the game to obtain given how quickly higher-level players can kill him.
| Item | Quantity | Drop Rate | Members Only |
|---|---|---|---|
 Mooleta Mooleta |
1 | 1/30 | No |
 Bottomless milk bucket (empty) Bottomless milk bucket (empty) |
1 | 1/37.5 | Yes |
 Cow slippers Cow slippers |
1 | 1/150 | Yes |
 Beef Beef |
1 | 1/1,000 | Yes |
Demonic Brutus (Hard Mode)
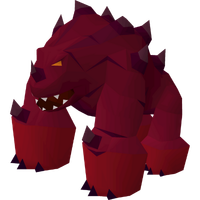
Once you’ve completed Desert Treasure II – The Fallen Empire, you can take on Demonic Brutus, a vastly harder members-only version of the fight. Despite being a reskinned cow, it’s one of the most punishing bosses in OSRS, with a combat level of 1224 and 750 hitpoints.

How to Unlock Demonic Brutus
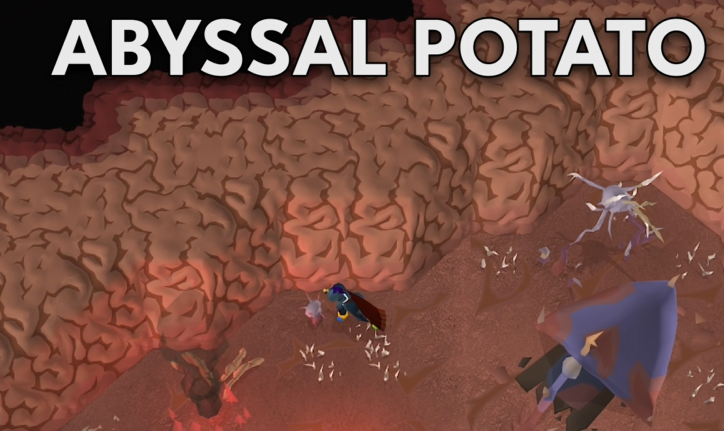
To trigger the hard mode fight, you need to feed Brutus an abyssal potato. These are obtained by plucking the growth found within the Scar, which is why completion of Desert Treasure II is required. You can reach the Scar by teleporting to Guardians of the Rift and travelling with the Catalytic Guardian, or simply by using the Ring of Shadows.
Each abyssal potato is consumed on entry and only grants a single attempt, so pick as many as you can — you’ll almost certainly need more than one. The fight itself takes place in an instance.
What Makes Hard Mode Different
- His basic melee attack hits through Protect from Melee (max hit 4 on the basic), so you can’t simply pray it away like the regular fight.
- He’s immune to stat drains and enchanted bolt effects, and despite the name, he is not classified as a demon (demonbane gear does nothing).
- He has very high Magic and Ranged defence, so a melee setup is strongly recommended.
- He can’t be killed as part of a cow Slayer task.

The Fight
Every two to three attacks, Demonic Brutus uses one of two special attacks. Which one comes first is random, but after that he alternates predictably between them:
- Charge – He spawns directly across from you and charges, followed by three ghostly copies that repeat the charge in rapid clockwise succession, starting with the real Brutus.
- Slam – He vanishes, reappears diagonally across from you, and stomps the area in front of him — again followed by three ghosts repeating it clockwise.
Getting clipped by any of the bulls deals 45–56 damage, so missing two dodges in quick succession without healing is usually a death. Standing too close to an obstacle when a special begins is even worse: you’ll be shoved into the open and locked out of running for the duration, which is effectively an instant kill. Tile markers are highly recommended for tracking your dodge positions.
Health Thresholds
- 66.6% (500 HP): His specials speed up, cutting your reaction time dramatically.
- 33.3% (250 HP): The ghost rotation flips from clockwise to counter-clockwise, forcing you onto different dodge tiles.
- 0 HP: He shouts “moo moo!” and heals 487 health to begin phase 2. Phase 2 plays like the 66.6% stage (fast specials), so you cycle back to the clockwise dodge tiles, then to the counter-clockwise tiles again once he hits 33.3%.
Phase 2 Prayer Orbs
The big addition in phase 2 is prayer switching. Each time Brutus starts a special, four orbs appear above your head, their colour showing which prayer to use. They land as each bull attacks, dealing 18–20 damage each. The first three are always magic → melee → ranged, and the fourth is random. These orbs also trigger auto-retaliate, so turn auto-retaliate off — otherwise it can path you straight into a special.
A clean way to survive this is to keep Protect from Melee up and simply tank the first (magic) orb for ~18–20 damage. Once you’ve stepped onto your second dodge tile, you can flick the ranged and random orbs without juggling movement at the same time. You take a little chip damage, but most deaths come from getting clipped by Brutus or his ghosts while fumbling prayer flicks — so prioritising movement over perfect prayer is the safer play.
Demonic Brutus Drops
Hard mode’s reward is mostly bragging rights: a cosmetic pair of Brutus slippers and an increased drop rate for the Beef pet. You’re fighting this one for the challenge and the collection log, not for profit.
Frequently Asked Questions
Is Brutus worth doing?
Yes — regular Brutus is one of the best free-to-play combat activities in the game. He’s the only source of the Mooleta (the only F2P defender), a great source of beginner clue scrolls, and one of the easiest pets to obtain at 1/1,000.
Can you fight Brutus in free-to-play?
Yes. Regular Brutus is fully free-to-play. Demonic Brutus, however, is members-only and requires Desert Treasure II.
How do I beat regular Brutus?
Pray Protect from Melee to negate his basic attack, then move away whenever you see his snort or growl telegraph to dodge the charge and slam specials. That’s the entire fight.
How hard is Demonic Brutus?
Very. It’s a combat level 1,224 boss with 750 hitpoints whose attacks hit through Protect from Melee and can deal 45–56 per bull. It’s considered one of the hardest fights in OSRS and demands precise movement and, in phase 2, prayer switching.
How do I start the Demonic Brutus fight?
Feed Brutus an abyssal potato, plucked from the growth in the Scar (requires Desert Treasure II). Each potato is one attempt, so bring several.