
Gielinor Games Season 5
Season Overview
Season 5 of Gielinor Games featured a dynamic format that evolved throughout the season. Contestants began in four teams of five during Weeks 1–4, transitioned into eight duos in Weeks 5–8, and competed individually from Weeks 9–11. The finale featured five remaining players competing solo.
Each episode consisted of:
- A main challenge
- A Banning, where players competed in an elimination challenge
The top performers in each challenge formed the Tribunal, who selected one player to enter the Banning. The second player was determined through a weighted voting system. All contestants received one attack vote and one defend vote, while the last-place finisher received an additional undefendable vote.
A random draw known as the Hopper selected the second player for the Banning based on vote percentages. Players with more votes had a higher chance of being chosen, making each vote directly impact the odds of elimination.
Standings


















E1 GieliGuessr

| # | Player | Result | Team |
|---|---|---|---|
| 1 |
|
314 | Soup's Quest Guides |
| 1 |
|
314 | Soup's Quest Guides |
| 1 |
|
314 | Soup's Quest Guides |
| 1 |
|
314 | Soup's Quest Guides |
| 1 |
|
314 | Soup's Quest Guides |
| 2 |
|
309 | Powerpuff Girls |
| 2 |
|
309 | Powerpuff Girls |
| 2 |
|
309 | Powerpuff Girls |
| 2 |
|
309 | Powerpuff Girls |
| 2 |
|
309 | Powerpuff Girls |
| 3 |
|
234 | Red Roosters |
| 3 |
|
234 | Red Roosters |
| 3 |
|
234 | Red Roosters |
| 3 |
|
234 | Red Roosters |
| 3 |
|
234 | Red Roosters |
| 4 |
|
208 | Snakelings |
| 4 |
|
208 | Snakelings |
| 4 |
|
208 | Snakelings |
| 4 |
|
208 | Snakelings |
| 4 |
|
208 | Snakelings |
E2 Bish Bash Boss

Each team must defeat 5 bosses in order from easiest to hardest while sharing the same supplies
Watch Episode| # | Player | Result | Team |
|---|---|---|---|
| 1 |
|
5 Bosses Killed | Snakelings |
| 1 |
|
5 Bosses Killed | Snakelings |
| 1 |
|
5 Bosses Killed | Snakelings |
| 1 |
|
5 Bosses Killed | Snakelings |
| 1 |
|
5 Bosses Killed | Snakelings |
| 2 |
|
4 Bosses Killed | Red Roosters |
| 2 |
|
4 Bosses Killed | Red Roosters |
| 2 |
|
4 Bosses Killed | Red Roosters |
| 2 |
|
4 Bosses Killed | Red Roosters |
| 3 |
|
4 Bosses Killed | Powerpuff Girls |
| 3 |
|
4 Bosses Killed | Powerpuff Girls |
| 3 |
|
4 Bosses Killed | Powerpuff Girls |
| 3 |
|
4 Bosses Killed | Powerpuff Girls |
| 3 |
|
4 Bosses Killed | Powerpuff Girls |
| 4 |
|
3 Bosses Killed | Soup's Quest Guides |
| 4 |
|
3 Bosses Killed | Soup's Quest Guides |
| 4 |
|
3 Bosses Killed | Soup's Quest Guides |
| 4 |
|
3 Bosses Killed | Soup's Quest Guides |
| 4 |
|
3 Bosses Killed | Soup's Quest Guides |
E3 Weight for It

| # | Player | Result | Team |
|---|---|---|---|
| 1 |
|
110 (109.6) | Snakelings |
| 1 |
|
110 (109.6) | Snakelings |
| 1 |
|
110 (109.6) | Snakelings |
| 1 |
|
110 (109.6) | Snakelings |
| 1 |
|
108 (109.6) | Snakelings |
| 2 |
|
106 (106.25) | Powerpuff Girls |
| 2 |
|
107 (106.25) | Powerpuff Girls |
| 2 |
|
106 (106.25) | Powerpuff Girls |
| 2 |
|
106 (106.25) | Powerpuff Girls |
| 3 |
|
98 (101) | Red Roosters |
| 3 |
|
102 (101) | Red Roosters |
| 3 |
|
102 (101) | Red Roosters |
| 3 |
|
102 (101) | Red Roosters |
| 4 |
|
100 (99.6) | Soup's Quest Guides |
| 4 |
|
100 (99.6) | Soup's Quest Guides |
| 4 |
|
99 (99.6) | Soup's Quest Guides |
| 4 |
|
99 (99.6) | Soup's Quest Guides |
| 4 |
|
100 (99.6) | Soup's Quest Guides |
E4 Chain Reaction

Collect a chain of items spawns. The next item picked up must start with the last letter of the previous item.
Watch Episode| # | Player | Result | Team |
|---|---|---|---|
| 1 |
|
24 | Snakelings |
| 1 |
|
24 | Snakelings |
| 1 |
|
24 | Snakelings |
| 1 |
|
24 | Snakelings |
| 1 |
|
24 | Snakelings |
| 2 |
|
17 | Soup's Quest Guides |
| 2 |
|
17 | Soup's Quest Guides |
| 2 |
|
17 | Soup's Quest Guides |
| 2 |
|
17 | Soup's Quest Guides |
| 3 |
|
15 | Red Roosters |
| 3 |
|
15 | Red Roosters |
| 3 |
|
15 | Red Roosters |
| 3 |
|
15 | Red Roosters |
| 4 |
|
6 | Powerpuff Girls |
| 4 |
|
6 | Powerpuff Girls |
| 4 |
|
6 | Powerpuff Girls |
| 4 |
|
6 | Powerpuff Girls |
E5 It Takes Two

| # | Player | Result | Team |
|---|---|---|---|
| 1 |
|
Finals | Skill Specs/Torvesta |
| 1 |
|
Finals | Skill Specs/Torvesta |
| 1 |
|
Finals | Gnomonkey/Odablock |
| 1 |
|
Finals | Gnomonkey/Odablock |
| 2 |
|
Semi Final Loss | B0aty/Solo Mission |
| 2 |
|
Semi Final Loss | B0aty/Solo Mission |
| 2 |
|
Semi Final Loss | Eliop14/Coxie |
| 2 |
|
Semi Final Loss | Eliop14/Coxie |
| 3 |
|
First Round Loss | C Engineer/Josh Isnt Gaming |
| 3 |
|
First Round Loss | C Engineer/Josh Isnt Gaming |
| 3 |
|
First Round Loss | Itswill/Potatohime |
| 3 |
|
First Round Loss | Itswill/Potatohime |
| 3 |
|
First Round Loss | Dino/Mr Mammal |
| 3 |
|
First Round Loss | Dino/Mr Mammal |
| 3 |
|
First Round Loss | Mika/Maybe Jessi |
| 3 |
|
First Round Loss | Mika/Maybe Jessi |
E6 Glitch Escape Room

Escape room puzzle challenge made by RuneScape escape room maker Glitch. The contestants had to escape from Falador Park,
Watch Episode| # | Player | Result | Team |
|---|---|---|---|
| 1 |
|
6:54 | Skill Specs/Torvesta |
| 1 |
|
6:54 | Skill Specs/Torvesta |
| 2 |
|
12:38 | B0aty/Solo Mission |
| 2 |
|
12:38 | B0aty/Solo Mission |
| 3 |
|
12:50 | Itswill/Potatohime |
| 3 |
|
12:50 | Itswill/Potatohime |
| 4 |
|
DNF | C Engineer/Josh Isnt Gaming |
| 4 |
|
DNF | C Engineer/Josh Isnt Gaming |
| 4 |
|
DNF | Dino/Mr Mammal |
| 4 |
|
DNF | Dino/Mr Mammal |
| 4 |
|
DNF | Gnomonkey/Odablock |
| 4 |
|
DNF | Gnomonkey/Odablock |
| 7 |
|
DNF | Eliop14/Coxie |
| 7 |
|
DNF | Eliop14/Coxie |
E7 Region Roulette

| # | Player | Result | Team |
|---|---|---|---|
| 1 |
|
580,093 (1,324,556) | B0aty/Solo Mission |
| 1 |
|
744,463 (1,324,556) | B0aty/Solo Mission |
| 2 |
|
363,515 (741,705) | C Engineer/Josh Isnt Gaming |
| 2 |
|
378,190 (741,705) | C Engineer/Josh Isnt Gaming |
| 3 |
|
300,264 (651,727) | Gnomonkey/Odablock |
| 3 |
|
351,163 (651,727) | Gnomonkey/Odablock |
| 4 |
|
221,627 (523,053) | Dino/Mr Mammal |
| 4 |
|
301,426 (523,053) | Dino/Mr Mammal |
| 5 |
|
139,443 (358,813) | Skill Specs/Torvesta |
| 5 |
|
219,370 (358,813) | Skill Specs/Torvesta |
| 6 |
|
113,514 (239,985) | Itswill/Potatohime |
| 6 |
|
126,471 (239,985) | Itswill/Potatohime |
E8 Skill Issue

Gain as many total levels as possible. PVP enabled. +15 total levels for a kill and -5 for each level 1 skill.
Watch Episode| # | Player | Result | Team |
|---|---|---|---|
| 1 |
|
306 (626) | B0aty/Solo Mission |
| 1 |
|
320 (626) | B0aty/Solo Mission |
| 2 |
|
257 (491) | C Engineer/Josh Isnt Gaming |
| 2 |
|
234 (491) | C Engineer/Josh Isnt Gaming |
| 3 |
|
208 (456) | Skill Specs/Torvesta |
| 3 |
|
248 (456) | Skill Specs/Torvesta |
| 4 |
|
177 (371) | Gnomonkey/Odablock |
| 4 |
|
194 (371) | Gnomonkey/Odablock |
| 5 |
|
101 (233) | Itswill/Mr Mammal |
| 5 |
|
132 (233) | Itswill/Mr Mammal |
E9 Five to Survive

| # | Player | Result |
|---|---|---|
| 1 |
|
14:16 |
| 2 |
|
14:24 |
| 3 |
|
14:47 |
| 4 |
|
15:25 |
| 5 |
|
16:43 |
| 6 |
|
22:01 |
| 7 |
|
22:09 |
| 8 |
|
24:08 |
E10 Curtain Call
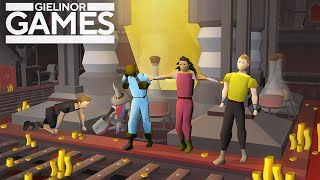
Complete the Theater of Blood as quickly as possible. Points for speed of raid, time to gear, money spent on gear, and 1hp boss room.
Watch Episode| # | Player | Result |
|---|---|---|
| 1 |
|
21 |
| 2 |
|
19 |
| 3 |
|
16 |
| 4 |
|
13 |
| 5 |
|
11 |
| 6 |
|
9 |
| 7 |
|
7 |
E11 Throwback

| # | Player | Result |
|---|---|---|
| 1 |
|
23:52 |
| 2 |
|
24:12 |
| 3 |
|
25:20 |
| 4 |
|
25:37 |
| 5 |
|
44:02 |
| 6 |
|
DNF |
E12 Game Over

| # | Player | Result |
|---|---|---|
| 1 |
|
23 |
| 2 |
|
19 |
| 3 |
|
11 |
| 4 |
|
8 |
| 5 |
|
7 |